Linux Mint is a Linux distribution based on Ubuntu, equipped with the Cinnamon, Mint and Xfce desktops. The system installer offers the possibility of installing non-free codecs and drivers, thanks to which a novice user has no problem playing popular audio and video files. The Mint release cycle depends on Ubuntu releases and new versions of the system are released about 1-2 months after the official premiere of Ubuntu.
For the purposes of this installation, I used the Linux Mint 22.1 Live/Instal ISO media with the Cinnamon desktop in UEFI mode. I performed the installation on a virtual machine, to which I assigned 20 GB of disk space, 1 processor core and 4 GB of RAM.
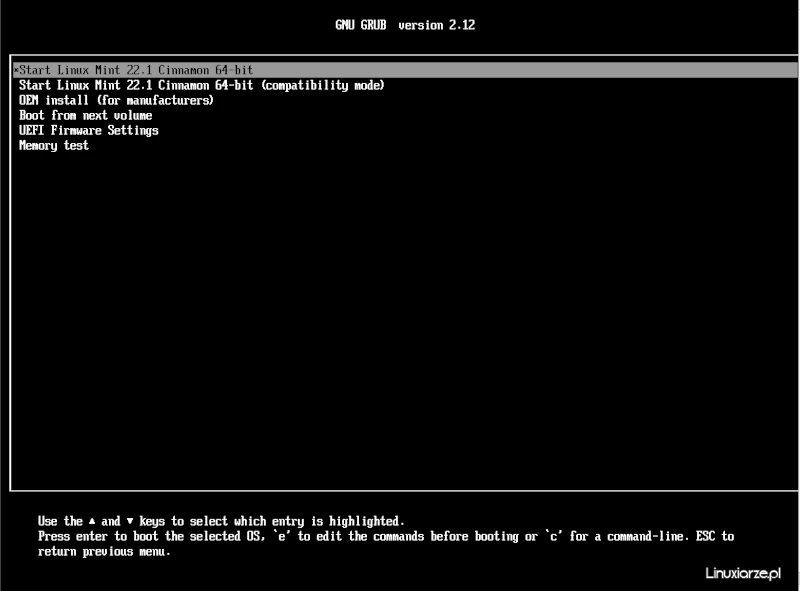
The live media is equipped with GRUB, which boots machines with UEFI or BIOS and has a graphical installer that should be run after the live system and graphical desktop have loaded.
1. The live system is started via GRUB, which also offers access to UEFI Firmware settings and OEM installation (for hardware manufacturers).
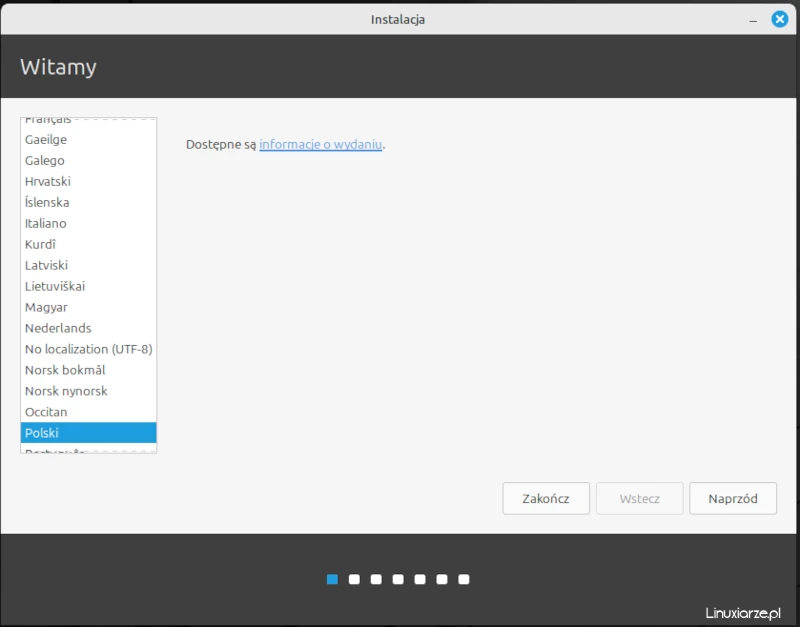
2. From the live system desktop, select the Install Linux Mint icon, and select the default installation language (here: Polish) in the first window.
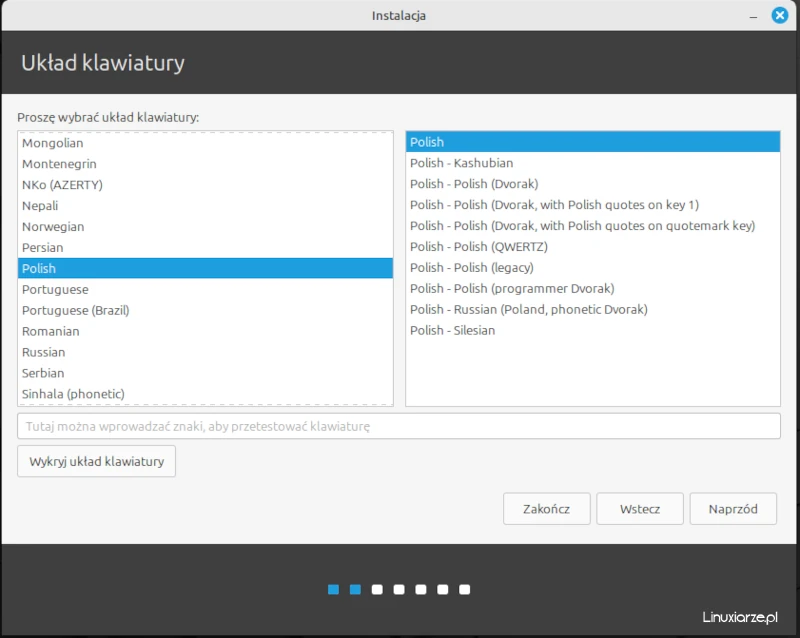
3. Then select the keyboard layout (here: Polish).
4. Now the installer allows you to install multimedia codecs that are required to play some audio and video formats. This is optional, but useful.

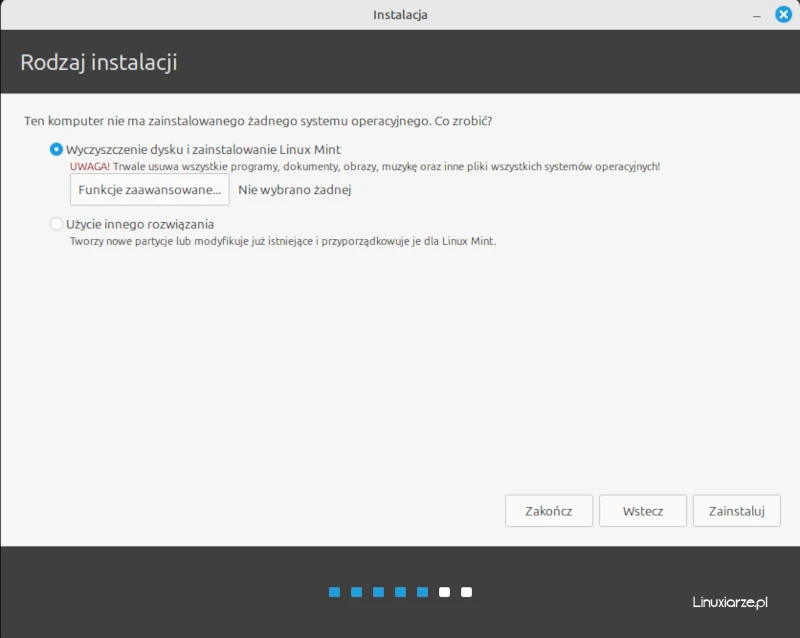
5. The next step is to select the disk or partition for Linux Mint installation.
You can allocate the entire disk by selecting the “Erase disk” option or select “Use another solution” to install Linux Mint on the selected partition.
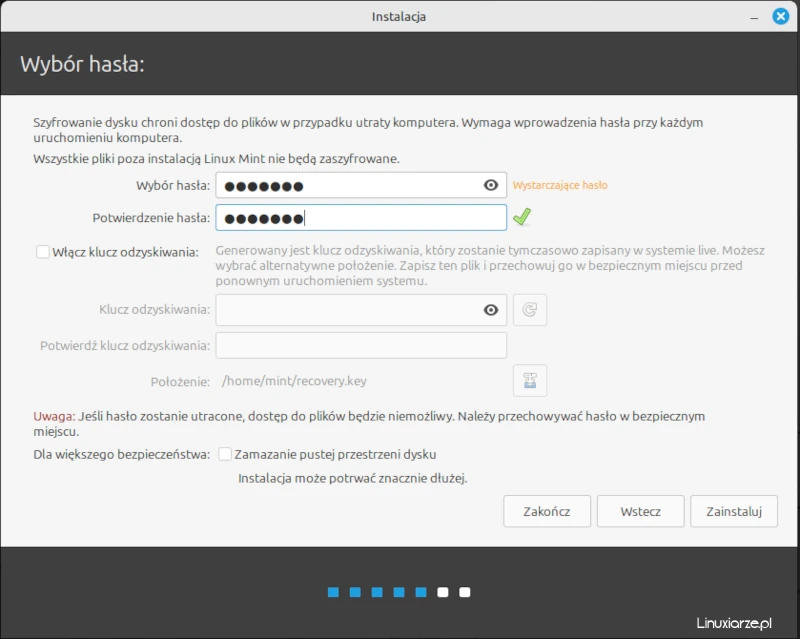
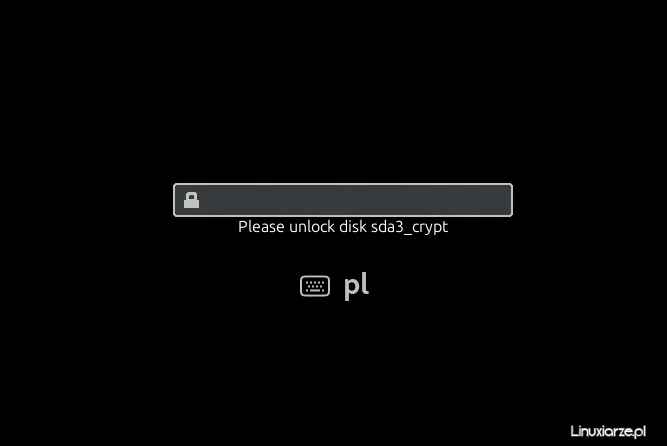
6. The “Advanced Features” option provides the ability to encrypt the entire disk.

7. If you have selected the disk encryption option, in the next step you must enter the disk encryption password.
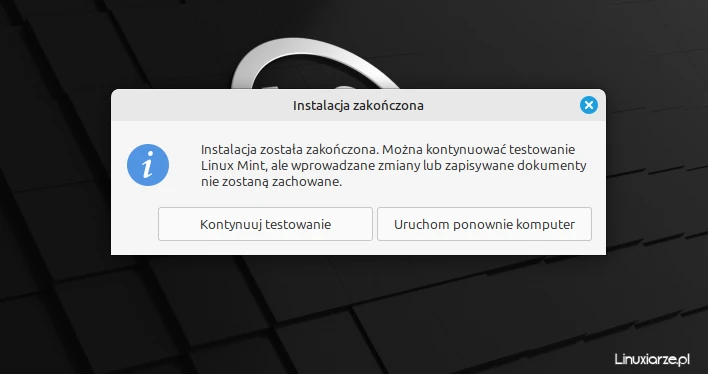
8. Confirming the settings will start the installation of Linux Mint on the computer’s disk.

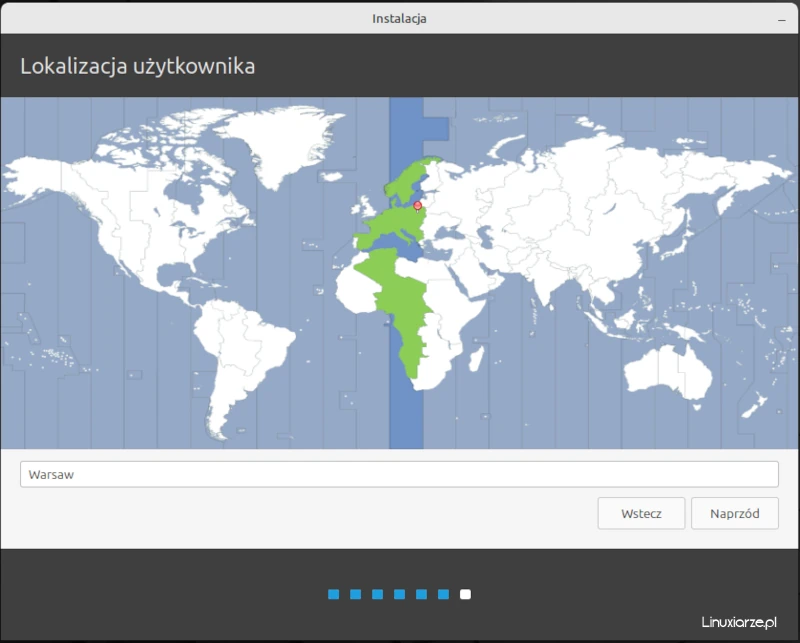
9. The next selection of settings concerns the time zone in which you are located (here: Poland, Warsaw).
10. The last settings window provides the ability to select the target system username, computer name (host), user password, automatic login option and encrypt the home directory (irrelevant in the case of installing the system on a single partition, without a separate home partition).

11. The installer has started its tasks, so wait for them to finish. The entire installation process on my machine finished after about 15 minutes.
12. Given that I chose disk encryption during installation, after starting the system from the disk, a password was required to decrypt the disk, which I set during system installation.
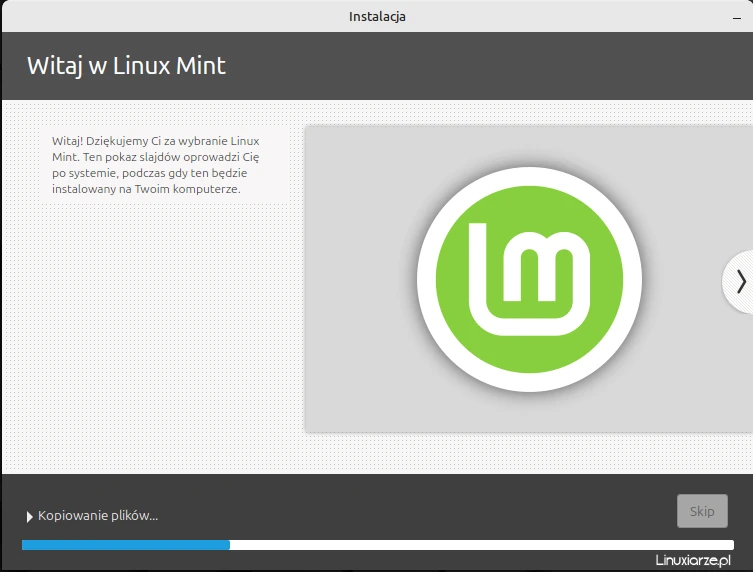
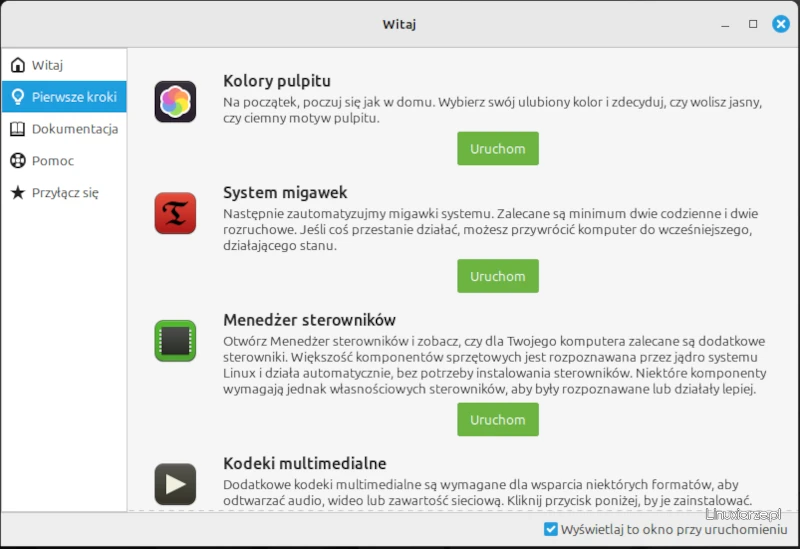
13. After starting Linux Mint for the first time, the Welcome application was automatically loaded, which allows you to configure and adjust individual system settings.

Summary
Installing Linux Mint based on Ubuntu is simple and intuitive, and does not require advanced knowledge of Linux. The individual stages of installation allow you to configure individual, basic system elements, and the rest of the configuration can be easily carried out after the first start of the system from the disk, using the Witaj application.
In the case of automatic installation on the surface of the entire disk, with encryption, the installer only encrypted the root partition, the EFI and SWAP partitions are not encrypted.
The system in idle mode, without running additional applications, uses about 1GB of RAM, which I consider, considering the Cinnamon desktop, to be quite a good result.
Generally speaking, Linux Mint can be recommended to Linux beginners.
Ten post jest dostępny również w języku polskim: https://linuxiarze.pl/linux-mint-22-instalacja/
One thought on “Linux Mint 22 Installation”