Arch Linux 2024 Installation

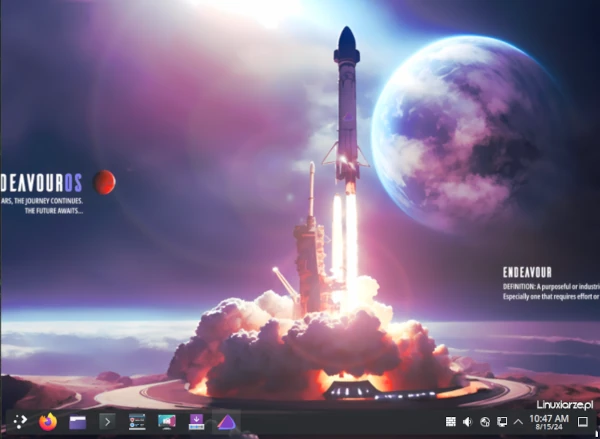
arch linux 2024 xfce

Arch Linux is an independent distribution created in 2002 by Judd Vinet based on the CRUX distribution. The system lacks graphical configurators, but this does not prevent its free management.

The current installation Arch Linux is my 5th attempt at this system, the first 3 were performed in 2011, 2012, 2013 and via Achoo! in 2016.

For the purposes of this installation, I used the Arch linux 2024.10.01 ISO media, I performed the installation on a virtual machine, to which I assigned 20 GB of disk space, 1 processor core and 1 GB of RAM. Text mode installation does not require more computing power, but using Arch after graphical installation, with many services, requires a bit more.

The live media is equipped with GRUB, which boots machines with UEFI or BIOS and has a text installer “archinstall”, which should be run after the live system loads.

archinstall

First, select the mirror server; here: Poland and the location “pl” and “pl_PL.UTF-8”.

time zone

keyboard layout

The next step is Disk configuration -> Partitioning, which allows you to use automatic partitioning, manual or previously mounted partitions (I chose automatic).

disk partitioning

disk partitioning

You should select the disk for installation (here: ATA VBOX), file system, subvolumes (in the case of choosing btrfs), compression and confirm the settings.

choose disk

disk setup

btrfs subvolumens

compression

confirm partitioning

The GRUB boot loader, swap partition and hostname are configured by default, you can change them, but if you are not sure, leave these settings as they are now.

The next step is to set the root password.

root setup

and add a new user; you can also add him to the sudo group so will have the administrator privileges.

user setup

The Profile option allows you to choose one of several graphical environments and window managers, I chose Xfce.

desktop setup

Now you can choose the default sound server that will be installed: Pipewire or Pulseaudio.

choose audio server

The Kernels option allows you to choose one of a few Linux kernels; the default is the latest, but the LTS kernel is a good choice.

The Additional packages option allows you to install additional packages, the names of which must be entered manually. To be sure it will be installed, I chose “networkmanager”.

The next option Network configuration allows you to copy the network configuration from the live system to the installation, use the networkmanager or manually configure it (I chose the first option).

network configuration

The next option configures the time zone, so I chose Europe/Warsaw.

The Optional repositories option allows you to enable the multilib and testing repositories, which I leave to each one individually (I don’t need them).

If all options are configured, you can start the Arch Linux installation by selecting Install.

installation setup confirmation

installation of arch linux started

At the end of the installation, the installer allows you to chroot into the installed system and apply any necessary corrections.

chrootinginto the arch linux system

The installation of the system took about 2 minutes in the version without a desktop, and 5 minutes in the version with the Xfce desktop.

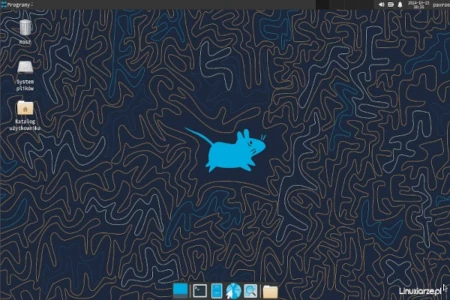
After starting the Arch Linux system from the disk, I logged in via LightDM and received a ready-to-work Xfce desktop with a minimal set of applications.

The Xfce desktop used 450 MB of RAM, which I consider a very good result.

Summary

Contrary to my earlier concerns, the Arch Linux text installer is quite well done, allowing you to configure most settings, choose a desktop, install additional packages, etc. My previous Arch installs were more mentally demanding and time-consuming.

If you are an Arch Linux lover, you can safely use the current installer to enjoy a pure, vanilla Arch Linux system.

 
Ten post jest dostępny również w języku polskim: https://linuxiarze.pl/arch-linux-2024-instalacja/

Ubuntu 24.04.1 LTS installation

ubuntu 24.04.1 lts

Ubuntu is a Live Linux distribution based on Debian, with the option of installing to a hard drive. The distribution is sponsored by Canonical and the Ubuntu Foundation, and the first version was released in 2004.

This installation of Ubuntu is my third installation of this system. I did my first installation of Ubuntu 10.04 LTS in 2010 and the second, Ubuntu 20.04 LTS in 2020. A little has changed since then, so I decided to do another, third installation of this popular Linux distribution.

For this installation I used the Ubuntu 24.04.1 LTS ISO media, I installed it on a virtual machine, to which I gave 25 GB of disk space, 2 processor cores and 4 GB of RAM.

The live media started in BIOS mode no longer has the Isolinux bootloader (as it was in older versions), but is equipped with GRUB, which boots machines with UEFI or BIOS motherboard.

After starting the graphics server, you first have the opportunity to configure the system according to your needs.
start installation

installation step 2

choose language

In the next step you can select the type of Internet connection or no connection at all (offline installation).

connect to the internet

Now you can install Ubuntu, or close the setup window and go to the Ubuntu desktop in live mode.

installation or live system

If you have chosen to install, in the next step select the type of installation:
– Interactive – recommended for novice users and new (first) installations
– Automated – allows you to use the autoinstall.yaml file, which will install Ubuntu according to the saved settings of previous installations.

installation mode

Now choose the programs that you want to install with your system:
– Default selection – just a few basic applications, ideal for configuring your system after the first boot from the disk
– Extended selection – if you want to install Ubuntu with a set of additional applications

package secection

You can also install proprietary drivers from third-party vendors and support for additional multimedia formats.

proprietary packages

The next step allows you to divide the disk, allocate partitions for Ubuntu installation in manual or automatic mode. Advanced features allow you to use LVM (Logical Volume Manager – an operating system mechanism for managing storage space), encryption or the ZFS file system.

disk partitioning

disk partitioning options

The next tasks involve configuring the target user, selecting the time zone and confirming the settings.

user configuration

time zone

confirmation

Installing Ubuntu 24.04.1 LTS on my virtual machine took about 20 minutes.

installation in progress

the end of installation ubuntu

After closing the live system, booting Ubuntu from the hard drive, and logging in, the system configurator was automatically launched.

welcome to ubuntu

One of the more interesting Ubuntu options is Ubuntu Pro activation, which extends technical support (updates) from 5 to 10 years. This option is free for up to 5 machines.

ubuntu pro

If you want to help the Ubuntu team improve it by sending data from your system – select the first option. Otherwise, use the second option.

send report

Closing the configuration window will take you to the desktop.
You can also launch the Software Center (app store) to install additional software.

end of post-installation configuration

The graphical system updater did not start, so I assumed there were no updates.
Having old habits and trusting only myself, I checked for updates (theoretically, the packages were updated during the system installation) – there was one update available, which you can perform, just like on Debian-derived systems:
sudo apt update && sudo apt upgrade

package-upgrading

At this point I’m done with Ubuntu.

Summary

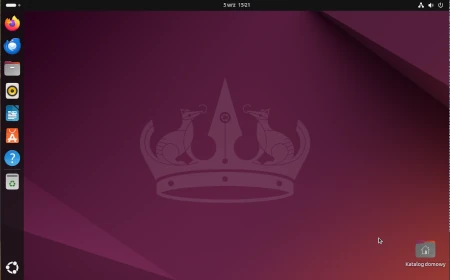
Ubuntu uses a slightly modified GNOME desktop by default. Personally, I think it looks like something between GNOME Shell and GNOME Flashback, with the Shell session preserved, but with slightly better functionality with Flashback.
The Live system uses about 1.4 GB of RAM at startup, which I consider a good result, but not the best.

After installing and booting from disk, Ubuntu without additional applications and services uses about 1 GB of RAM, which I also consider a pretty good achievement.

However, considering that Ubuntu is not available for old 32-bit machines, and old 64-bit machines may not have enough power to handle Ubuntu, I conclude that Ubuntu is currently aimed only at newer generation computers with 64-bit processors.

Ubuntu still supports slightly older 64-bit machines equipped with BIOS, instead of UEFI, which allows the system to be started and installed on mid-range machines.

Installing Ubuntu on a computer with less than 4 GB of RAM is a mistake in my opinion.

Summing up the relatively quick (about 20 min.) installation of the system on the disk, its simplicity and additional options for more advanced users, updating packages during installation and choosing the minimal installation mode or with additional applications, I can safely say that I can still recommend Ubuntu LTS to beginner Linux users.

 
Ten post dostępny jest również w języku polskim: https://linuxiarze.pl/instalacja-ubuntu-24-04-1-lts/

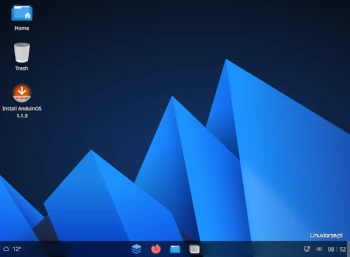
EndeavourOS – system installation and first impressions

endeavouros 20240625

EndeavourOS is a rolling Linux distribution based on the Arch Linux. The project is intended to be a spiritual successor to Antergos – providing easy configuration and a pre-configured desktop environment based on Arch.

After the failure of the previous installation of CachyOS, I decided to test another system from a similar segment, also based on Arch Linux, so my choice fell on EndeavourOS.

The ISO media allows you to run the live system with closed Nvidia graphics drivers or open-source ones. The live system is equipped with only a few basic applications.

The live system is not a speed demon, but it is quite fast, despite the default KDE Plasma desktop – the desktop with basic services uses 2.5GB of RAM on iddle.

For the installation in the VirtualBox virtual machine, I allocated 25GB of disk space, 2 processor cores, 4GB of RAM and performed it in UEFI mode, with full disk encryption. The ISO media used was EndeavourOS 20240625 x86_64.

The live system automatically loaded the welcome window in English, but after selecting “Change language” I changed the language to my one (Polish).

welcome window

Starting the system installation from the Welcome window allows you to choose the installation method:
– online – you can choose one of the available desktops; an active Internet connection is required; packages will be updated to the latest versions
– offline – the system is installed in the same form as the live system, with the KDE Plasma desktop and without package updates

Due to the high resource consumption of Plasma, I chose the online installation to install another, lighter desktop.

installation mode

The well-known Calamares installer in Polish started – choosing the default settings did not require any changes to the configuration.

calamares main window

time zone

keyboard layout

Now I could choose another desktop, my choice was Xfce. I also checked the installation of an additional kernel from the long-term support (LTS) line. In this case, the 6.10.4 kernel was installed as the default and 6.6.46 LTS.

desktop selection

desktop selection list

In the next step, the installer allows you to choose the boot loader: systemd-boot (default), GRUB or without installing the bootloader – I chose the default one.

bootloader section

Since I install the system on a clean disk, I chose the option to clean and use the entire disk with encryption (for testing purposes).

disk partitioning

Then configure the target user and confirm the settings.

target user configuration

setting confirmation

Now you can start transferring EndevaourOS to your computer’s disk.

starting the installation

The installation process went without any problems, you can close the installer window and boot the system from the hard disk.

installation finished

Since I chose full disk encryption, during system startup I was asked to enter the disk decryption password – the password was accepted, so so far it’s going well.

Then a graphical login window was launched, after logging in I received the Xfce desktop, selected during installation.

The Welcome window launched automatically offers many options to facilitate management and configuration of the system and desktop.

welcome window

First, I chose to update packages – all were updated during the system installation on the disk, but I wanted to be sure.

updating packages

Of the many options available in the Welcome application, one of them allows you to install selected programs from various categories.

package selection

Summary

The live system with the KDE Plasma desktop on the virtual machine was not a speed demon, but working on it was quite bearable. It is not my favorite desktop, but the possibility of installing one of a dozen others solves this inconvenience.

The 2.5GB RAM consumption in the live system by the KDE Plasma desktop is definitely too high for me.

The installation on the disk with the Calamares installer took place in the background, i.e. without any terminal windows popping up.

The installation itself took about 15 minutes, which I consider a very good result.

The target system with the Xfce desktop did not contain many applications, I would rather say that it is ascetic in this respect. RAM usage was around 700-800 MB, which I consider a good result, but considering Plasma, you shouldn’t expect anything better (you may need to disable some unnecessary services).

Installing additional software using your own graphical tool is useful, as is the ability to configure many aspects of the system, especially for beginners in Linux.

Considering that the system is based on Arch Linux and AUR packages and repositories, a good solution would be to include a graphical Pacman GUI frontend in the system – Octopi, which I missed here.

However, considering the entire test performed with EndeavourOS, I am pleasantly surprised and I can recommend this system to beginners in Linux who are fans of Arch Linux.

 
Ten post jest dostępny również w języku polskim: https://linuxiarze.pl/endeavouros-instalacja-systemu-i-pierwsze-wrazenia/

CachyOS – system installation and first impressions

cachy os

CachyOS is a Linux distribution based on Arch Linux with advanced optimizations and multiple architectures for the ultimate desktop experience. CachyOS has support for the following file systems: btrfs, zfs, wew4, xfs, f2fs and several desktops that can be selected during system installation directly from the installer window.

The ISO media allows you to run a live system with closed or open-source Nvidia graphics drivers.

The live system is equipped with only a few applications, such as the Cachy Browser web browser, VLC media player, Konsole and Alacritty, Dolphin file manager, GParted, lftp – a console FTP client.

The live system launched in a virtual machine is sluggish, loads slowly, the desktop with basic services uses 1.1GB of RAM.

Launching a web browser called Cachy Browser, based on Librewolf, which is based on Firefox, took several seconds, which is not a good sign of the system’s responsiveness.

For installation in the QEMU(KVM) virtual machine, I allocated 30GB of disk space, 4 processor cores and 3GB of RAM and performed it in UEFI mode, with full disk encryption. The ISO media used is CachyOS Desktop 20240714 x86_64.

There is no icon launching the CachyOS installer in the program menu and on the desktop – access to it is only possible through the Hello CachyOS application.

hello cachy

After choosing how to install the bootloader in a small window (I chose Grub), the actual installer, the well-known Calamares, launches.

bootloader

calamares

Choosing your time zone and keyboard layout is one of your first tasks.

time zone

keyboard leyout

Then I chose the brtfs file system and the option to encrypt the entire disk in automatic partitioning mode. You must enter the password twice to decrypt the disk.

disk partitioning

In the next step, select the default desktop for the target system – I chose the relatively light Xfce.

desktop settings

desktop settings

After entering the new username and password, I completed the configuration of the target system.

target user configuration

starting installation

Tasks requiring package installation were displayed in the terminal emulator, above the Calamares window; usually these tasks in Calamares are done in the background.

package updating

If I noticed correctly, installing the system in online mode in this case does not involve copying the live system from the ISO media and its subsequent configuration with the selected new desktop, but all system packages are downloaded and installed from the server.

After 20 minutes the installation hung on updating packages, and after another 5 minutes I closed the VM with an unfinished installation.

installation error

The second installation attempt was no frills: default KDE Plasma desktop, no encryption, UEFi, and automatic disk partitioning as before. This time I chose systemd-boot suggested as the default bootloader and the ext4 file system.

after 20 minutes the installation hung again on updating packages, I took a coffee break and after another 30 minutes I closed the VM with the unfinished installation.

And that’s how I finished installing CachyOS.
I did not make the third attempt due to lack of time and lack of hope for success. Maybe the next release will be more polished.

Summary

Equipping the system with only a few basic applications has its advantages and disadvantages.
– Good: you can install your own favorite applications without having to remove unwanted ones
– Bad: beginner Linux users may have problems installing additional programs, especially after switching from another system where the applications for specific tasks are completely different.

I did not install the system on the disk correctly, all because of an installer error. I was unable to test the system after installation, booted from disk. For this reason, I cannot comment in any way on the performance of the target system, package updates, installation of new packages, or its responsiveness.

However, the live system with my hardware configuration worked hard and slowly, applications started with a significant delay, which has a significant impact on my poor assessment of the live version. From this observation alone, I can conclude that CachyOS is not aimed at owners of older computers, but rather newer ones with better parameters.

Maybe one of the next versions of CachyOS will encourage me to try the installation again.

 
Ten post jest dostępny również w języku polskim: https://linuxiarze.pl/cachyos-instalacja-systemu-i-pierwsze-wrazenia/

Skip to content